Monday, March 28, 2011
Video on running concept lIsts
Put simply, running concept lists are a set of lists, each list relating to a single concept, that you update continually as you learn more about each concept. They are easy to make and to maintain. And they are very handy tools for learning new concepts . . . or for reviewing old concepts.
But they are even more helpful for learning the connections between concepts . . . thus developing your critical thinking skills!
Concept lists are also called connection pages because they help you see connections.
I've outlined this ongoing study technique several times before. You may want to review those previous articles.
As you grow your library of running concepts lists, you'll find that you have constructed a personal encyclopedia of knowledge! One that you can build on (and refer back to) for a lifetime.
If you haven't bothered to learn about running concept lists before, you may want to reconsider this powerful tool.
Recently, I added this video to my page on Concept Lists found in the Lion Den Study Tips & Tools.
Tuesday, March 15, 2011
Why are you here?
Based on my experience of decades teaching A&P, I've found that all too many students can only answer, "because it's required."
An answer that is much better for the student is, "to learn the concepts of human structure and function that I will need in later courses and in a lifetime career in a health or sports career."
Really, the A&P course is required of you for a reason. It's not simply to jump through a hoop. Or to weed out the weak students. The reason is simple. You cannot fully understand, or even begin to understand, many of the concepts you'll run into later without a thoroughly embedded understanding of the principles of human anatomy and physiology. Period.
If you pick up ANY textbook from a course in the health professions, you will find references to human anatomy and physiology principles scattered throughout. Many such textbooks will even refer to "what you learned in your anatomy and physiology course," sometimes providing a quick review before jumping into a more complicated topic. If you fail to learn your A&P now, then those quick reviews won't be just a review, will they? They'll be a warning sign that you are about to get into something you are not prepared for!
So why do I ask this question? And propose a "correct" answer?
Because if you get on board with the "correct answer" now, you'll dramatically change how you study A&P . . . for the better!
The sooner you realize that you'll need all of these concepts to be successful in your later learning--and in your ongoing career--the sooner you will realize that studying for the test just won't cut it. You have to shift out of the short-term view and start thinking about learning for a lifetime.
Instead of cramming just before a test, to learn some facts that will stay with you for only a few hours, you'll study every day so that you'll never forget what you are learning. You'll continually review material from previous topics because you'll notice them coming up again and again.
With the long view, you'll also start working on understanding relationships among the various principles you are learning. You'll begin to see why it's important to know the basic principles deeply because it makes everything you encounter in human science more understandable and thus easier to learn.
Not to scare you, but a conversation I recently had with some teachers in a health-professions program confirmed again for me the fact that you will fail your professional courses if you don't remember most of your A&P.
Isn't that a good reason to evaluate how you approach your studies in A&P?
[Need some help in finding ways to learn more deeply? Besides asking your A&P professor for advice, why not try the tips I offer my students at the Lion Den Tips & Tools?]
Saturday, March 5, 2011
Concept Map Video
Also known as mind maps, these tools are simply a way to visualize a concept.
Concept maps are diagrams that related different elements of a concept to each other and/or to the main idea. These diagrams can be simple or complex—depending on your own style of learning and what helps you understand the concept.
If you haven't bothered to learn about them before, you may want to reconsider this powerful tool.
Recently, I added this video to my page on Concept Maps found in the Lion Den Study Tips & Tools.
Thursday, February 24, 2011
Help significant others help YOU
Welcome to the club! This is a common issue in rigorous, time-consuming courses like anatomy and physiology.
A&P is a foundational course, one that you really cannot skimp on because the whole rest of your training and your career rests on success in learning the concepts of A&P thoroughly. But then again, you need your personal relationships to succeed, too!
One strategy that I've seen work well is summarized in my book Survival Guide For Anatomy And Physiology: Tips, Techniques And Shortcuts. It's actually pretty simple and pretty easy, for something that works so well!
As early in your studies as possible, take some quality time with those close to you to bring them on board with your commitment to doing well in A&P. Explain to them what your career goals are and how success in achieving those goals may benefit them as well. If for no other reason than they love and support you. But sometimes, career success may bring many other rewards to family and spousal relationships.
After they are on board with your careers goals, make it clear how hard--and how time-consuming--some of the steps along the way are going to be. Explain how success in A&P is a critical first step . . . a step that will be particularly draining and time-consuming.
After explaining the sacrifices that you'll be making--the great effort that you'll be putting into success--ask them if they are willing to help support you by giving you the time you need. Explain that by doing so, each of them will be part of your team.
Assuming that those who love you want to be part of your team, work together to find specific ways they can help you. The more that they can come up with on their own, the more ownership they will take in their part of the team effort.
Here are some examples your team may come up with:
- Trying not to pester you when you study
- Taking over one or more of your household/farm/yard/work chores
- Not giving you grief when you have to occasionally reduce your fun time with them
- Agreeing to occasionally help you with your studying (like quizzing you with flash cards)
- Acting as a child sitter or backup child sitter when you need to go to
- class
- participate in study sessions
- get help from your professor
- visit the library or learning center
- have time alone to study
Such a discussion, if handled well, can go far in helping you balance things in your life while you tackle A&P . . . by bringing your loved ones on board early and making them part of the process.
Something that is especially helpful for families, couples, or friendships, is to work together to compose a pledge that you can hang on your refrigerator or keep in your notebook. This pledge would state the kinds of support that you can expect. And your pledge to be mindful of their efforts and your intent to be appreciative. When things get tough, it may help diffuse the frustration by calmly renewing your mutual pledge.
Saturday, February 12, 2011
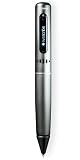
Record with your pen!
Smartpens
For example, you can turn on the Smartpen
After class, all you have to do is tap on a part of your notes to replay the audio that goes with it! Or you can replay the whole class! If you are using the earbuds that come with the pen, you could also replay a part of the class that you want to replay.
If you want to, you can then dock your Smartpen in a small USB penholder that comes with your Smartpens
Once a recording is in your library, you can upload it to the Livescribe site as a pencast. You can then review the pencast any time you like. You can keep your pencasts private or you can share them publicly.
This is a great way to replay an entire class to review it . . . or to go back to a part of the class that puzzles you so you can replay your note taking while the voices of your professor and classmates are also replayed. What a great way to review your newly learned A&P concepts!
If you use the Smartpen to record others, make sure you have their permission first. Not all professors permit their classes to be recorded. And test out the volume settings and your location in the room to get the best recording.
Here is a simple example of a pencast that quickly summarizes one concept in A&P.
A great study project for your A&P study group would be to produce pencasts like this example and post them to share with the whole class!
To use the Smartpen you have to use the special paper that comes with the pen. Livescribe also provides a file that allows you to print the special paper on your computer printer. However, I prefer to use the inexpensive notebooks
This video briefly summarizes the concept of the Smartpen and how you can use it to improve learning.
If you already have some pencasts for A&P that you've posted for public viewing, why not post the link here? Just "comment" on this blog article and include the link.
Friday, January 28, 2011
FREE body browser
The Body Browser is a FREE online tool that you can use to explore the anatomy of the human body in a "virtual dissection" format. Using the familiar Google Maps navigation tools, you can . . .
- Peel (or fade) away layers of the body . . . removing the skin, then muscles, then bones, to reveal the internal organs
- Select systems (skeletal, muscular, nervous, cardiovascular) to view
- Click on any structure to show its label
- Type the name of any structure in the search box to find it in the body
- Tilt, zoom, turn the body to a variety of positions to see organs in more views that usually available in a textbook, atlas, or chart
I think Body Browser a is a great FREE tool for A&P students to have access to an online model of the human body that can be used for a beginning study of anatomy. Because it allows the user to type in the names of organs for which they are looking, you can be certain it will work well with what you need to know for your course.
There are a few minor limitations of the Body Browser:
- The only available specimen is female (that is, there is no male specimen available to complement the female specimen)
- The specimen is partially clothed. Although one can see some of the underlying surface structures as the "skin" layer fades back, it's not the same as seeing these structures clearly. An odd feature that makes certain regions of the body "off limits." (I've seen some hacks to fix this, but none of them work for me using the Chrome browser)
- Some of the organs are roughly rendered, so it's not as detailed (at least in some areas) as you may like to see
- Only a few systems can be shown in entirety. Some useful system views that are missing are the lymphatic system and the respiratory system
- You cannot select or hide individual organs for display
- I could find no documentation or even a help button (pretty typical of the experimental Google Labs resources)
- a study tool during a solo or study group session to demonstrate the location and structure of specific organs
- you could use it live or you could record a session with Jing or similar recording tool and use the pre-recorded exploration to review or to share with others in your study group or class
- you can send the URL of a specific view (perhaps with a label) to a student or group of students or post it to Facebook, Twitter, or a class website
- alternative lab model to use along with physical models in the lab
- use it as a reference side by side with your lab manual and your laboratory model
- use it in place of a laboratory model when studying at home or away from the lab
- a way to create images for
- your class notes
- concept maps
- study guides and review sheets
- class presentations, lab reports, term papers, and other assignments
Do you have some other ideas for using Body Browser in an undergraduate A&P course? Just use the comment feature and share your ideas with us!
Check out this video to see a demo of the currently available features of Body Browser
Thursday, January 20, 2011
Painless memorization with Quizlet
A lot of folks dread memorization tasks because they simply don't know how to do it in a quick, pain-free manner. Once you know the tricks of memorization, it's not that bad.
The essential trick is to practice, practice, practice.
That means every day, several times a day, if possible.
However, this will only work if you spend just a few minutes at a time practicing. If you try to get in all in one long session, it won't work . . . or at least least is won't work very well. In fact, the "long session approach" can sometimes burn you out so badly, it'll be hard to make yourself study the same topic again.
One of the easiest ways to practice painlessly is to make and use flashcards. I have a previous blog post and a study tip web page and even a YouTube video devoted to methods of using flashcards to study A&P effectively.
My friend Monica Hall-Woods (another A&P professor) reminded me recently of a website called Quizlet.com where you can easily make a set of flashcards online (for FREE) and use it to study and to quiz yourself. In fact, Quizlet.com gives you some alternative methods to quiz yourself, including some fun, game-like activities.
The more practice sessions you do on Quizlet.com, the more you'll almost effortlessly pick up the basic facts that you are trying to learn. Quizlet.com helps you keep track of what you've studied and how you are doing.
You can also upload photos from Flikr.com . . . which means that you can take photos of your lab specimens with your smartphone, then upload the images into a set of flashcards!
Another great feature of Quizlet.com is that you can form study groups. This allows one or more users to post and share sets of flashcards related to a particular topic.
Quizlet.com also lets you use flashcard stacks that others have created. (Warning: be careful those you use are accurate before using them to study.) Here's a stack of cards that I created simply by cutting and pasting a list I already had into the Quizlet.com editor:
Try it! Use different options for quizzing yourself and playing games. I think you'll have fun with it. Which is the point . . . the less pain, the more gain. At least in this case.
Let me know what you think! And use the comment feature (below this blog article) to post your favorite Quizlet.com sets you've made or found . . . so other A&P students can benefit.
Wednesday, December 8, 2010
Don't forget to breathe!
Well, duh-uh, of course you are going to breathe. What I'm referring to is a proven, effective way to quickly and easily reduce test anxiety during a final exam. We all suffer from some degree of text anxiety, right? So I think we can all benefit from this technique.
It's simple: when you start to feel anxious or stressed during an exam simply stop focusing on the exam and start focusing on your breathing. Breathe slowly and try to soften your focus, so that you're not really concentrating on anything in particular. But you are vaguely aware of the slow inhalation and exhalation of quiet breathing.
As a recent report on National Public Radio reminds us, this seems to trigger our parasympathetic "quiet breathing" response . . . thus counteracting the sympathetic "stress response" that is often characterized by rapid breaths. This "trick" gets the body to reduce the stress response all around.
Because we know that stress can reduce test performance outcomes, it's a good idea to do what you can to reduce test anxiety during an exam right?
By the way, it seems to work better if you practice it frequently . . . so why not start right now?
Listen to (or read) the story at Just Breathe: The Body Has a Built-in Stress Reliever.
To help you get ready, look at some of my previous blog articles for tips, tricks, and videos on various other exam strategies.
Wednesday, December 1, 2010
Concept Mapping
You've seen concept maps before. They are scattered throughout your A&P textbook. They can take the form of flow charts, tables, circle diagrams, sketches, and so on. When you make your own concept map, you help yourself to learn how it all fits together.
If you struggle with putting together a concept map, that's great! That means that you've identified a specific hole in your understanding. You can't complete a concept map unless you understand where to place all the bits into the picture, right? Once you stumble, you know what parts of your understanding are weak. And that means you know what sections of the textbook you need to explore further. Or what questions you need to ask your study group, your professor, or your tutor.
When you've finished the concept map, you've learned quite a bit. Your understanding of the concept is deeper.
And the finished concept map serves as a handy reference for future study and review. If you keep it for the long term, which I recommend, it becomes part of your own personal encyclopedia that never stops growing. And which, I hope, you continue to update as your learning expands.
I recently ran across a FREE online tool that creates concepts maps in a simple chart style. It's called Text2MindMap.com and it's really easy to use. You just cut and paste (or type in) and outline of a concept and the tool will automatically generate a concept map!
You can then tweak the layout, the levels, the colors, the fonts, etc. Then with a single click you can save your concept map as a graphics file. You then have the option of printing out your concept map or sharing it with a friend or embedding it in your class notes.
Want to know more about concept mapping? Visit my page on Concept Maps in the Lion Den.
Tuesday, September 28, 2010
Trouble with tissues?
First, each example is unique. No two examples look exactly alike, just like no two fingerprints look exactly alike.So you have to learn to look for patterns. And you can't do that until you've looked at a lot of examples. And that takes time—and a lot of practice.
Second, not all examples are stained in exactly the same way. Even when the same general type of staining is used, a lot depends on the quality of the sample, the quality of the stain used, and how well the preparer did their job. So again, you have to look for patterns. For example, stratified squamous epithelium can be found in wildly different colors, depending upon which type of staining technique is used. But no matter what the color, the pattern of flattened cells near the free edge, progressing to cuboidal and perhaps even column-shaped cells further away from the free edge, will still be present.
Third, when you look for patterns you have to remember what part of the pattern is important. You also have to remember that many patterns are very similar, so you have to remember how to tell them apart. For example, dense fibrous connective tissue can look a lot like fibrocartilage at first glance. You have to learn to look for the little white halos around the cells in fibrocartilage that tell you that the cells are within lacunae (spaces).
Oh, did I mention that practice, practice, practice is important?
Tissue identification really isn't as hard as it first seems. It really is mainly just a matter of putting the time into practicing.
Here are some tips for getting the most practice time in during the short time you have studied tissues:
- Spend as much time in the lab as possible. If there are open lab times available, by all means take advantage of it.
- If there is a learning center available with tissue specimens spend as much time as you can with them.
- Use the examples published in your textbook and lab manual, or any other resource (such as a Brief Atlas of the Body),to practice identifying tissues. Cover up the labels and see if you can identify them. Make a photocopy of the images, cutaway or cover-up the labels, and test yourself.
- Ask your instructor for other sources of practice images. Sometimes, someone will have taken photographs of the specimens used in your class. This is a good resource for practicing.
- There are a lot of online resources for practicing tissue identification. Here are a few of my favorites – you can find many more by searching the web using key terms such as "tissues," "histology," and similar terms.
- LUMEN
[Loyola University's famous histology site; includes lessons on histology]
- Blue Histology
[Histology site at School of Anatomy and Human Biology, University of Western Australia]
- Dr. Stephen Larsen's Channel (YouTube)
[Dr. Larsen walks you through a variety of specimens as they are seen under the microscope.]
- The A&P Professor Free Image Library
[My site for A&P teachers includes links to free images of tissues that you can use to practice histology.]
- Use flash cards (study cards) with photocopies of tissue specimens or printouts of digital images. See my recent blog article for a video on how to use flash cards in this manner. Mosby's Anatomy & Physiology Study and Review Cards
includes some histology cards along with all other topics in A&P.
- Try to study a little bit several times each day, rather than a few long sessions several days apart. Constant practice is what works best.
Sunday, September 26, 2010
Using flash cards
Flash cards, also known as study cards, are one of the most useful strategies you can use in studying human anatomy & physiology.
Here's a brief video that offers some practical tips for using study cards to reduce your study time and get a solid foundation in learning any topic. This video also includes some surprising advanced techniques that show how to use flash cards to also learn higher-level thinking in any topic of A&P . . . or any other subject.
The video includes
- A clear explanation of the Leitner system, plus my own "easy to use" adaptation of the Leitner system
- Using color codes and symbols
- How to use cards to learn processes and ordered structures
- How to use cards to build concept maps (mind maps).
You can find many other tips on using flash cards at the newly updated page New Terms at http://lionden.com/new_terms.htm and in previous articles in The A&P Student blog.
Looking for packaged study cards that you can use for your A&P course?
Try Mosby's Anatomy & Physiology Study and Review Cards
Monday, July 26, 2010
Whack a Bone!
These arcade-style games are a wacky way to quickly pickup the the basics of human anatomy before you dive into the details. Or should I say "whacky?" . . . because one of my favorites is Whack a Bone (a parody of the famous Whack a Mole arcade game).
In Whack a Bone, you quickly learn the names and locations of the major bones of the skeleton, one region at a time. Even for an old pro like me, I found the Whack a Bone games to be fun. The games include won't help you learn any of the foramina of the skull or the other detailed features and regions of each individual bone. But they will help you get started by quickly learning the bone names and their shapes and locations and relationships to other bones in a painless and fun way.
Some of the other games found at Anatomy Arcade are
- Poke a Muscle
- Match a Brain
- Digestive Jigsaw
- Eye Jigsaw
- Match a Body System
All these games are meant for learning the body's structure at a very elementary level . . . exactly where all A&P students need to start. You cannot get to the details until you have learned the basics.
Let me know what you think about the Anatomy Arcade games! (post a comment here)
Sunday, May 16, 2010
Selling your textbook?
This is the time of year when many A&P students think about selling their textbook back to the bookstore or textbook co-op. Some sell them directly to other students on campus or through an online platform. DON'T DO IT!
Why not? Because you still need it!
Just because your A&P course is over, your use of your A&P textbook is far from over. Here are just a few of the many reasons you should keep your A&P materials, including the textbook:
- You'll need to review your A&P at the start of nearly every topic in your professional / clinical courses. Many nursing, medical, and allied health textbooks include a brief review of A&P . . . but you'll do better with a quick skim of your fully illustrated A&P textbook.
- Your A&P textbook will get you out of a jam. There will be occasional moments when you "blank out" on some essential bit of A&P . . . something you need to "get it" in a later course. Your trusty A&P textbook will come to your rescue by providing refreshing your understanding of that tricky concept . . . in a way that is already familiar and comfortable for you.
- You need to start a professional library. So many health professionals begin their careers regretting that they sold off many of the essential reference tools they need to get started in a successful professional career. Your A&P textbook is the core around which you should begin building your professional library of resources.
- When you're out there in the "real world" you'll need some tools to help you cope with new situations. It's a great comfort to have your A&P book there to help you review basic concepts that you haven't run across in a while. When you're pulled to a different department, start a job in a new specialty, or struggle through a professional continuing education course, you'll find your old A&P book is a great place to dig out all those things you know you know . . . but with which you need some brushing up.
I just smile and reply, "you sold off yours after our course ended, didn't you?"
The sheepish reply then comes, "yeah, I know you told us to hold on to it but I didn't think I'd really need it. Now I REALLY need it to help me in my nursing course!"
[FYI, we A&P professors really do NOT have a pile of old A&P books laying around to give away.]
Considering that you rarely get much of a return on selling a used textbook, it really isn't much of a hardship to keep your A&P textbook. You'll be really glad that you did!
Also see my Study Tip Your Professional Library in the Lion Den.
Monday, March 22, 2010
Translating muscle names
But what makes those muscle names so odd . . . the fact that they are Latin phrases . . . can be used as a shortcut to help you identify those muscles!
For example, the muscle name latissimus dorsi tells you exactly where to find this muscle. Latissimus means "way over to the side" and dorsi means "back." So the phrase latissimus dorsi muscle means "back muscle way over to the side." This not only tells you exactly where the muscle is . . . once you learn the meaning of the name, you have a way to remember the muscle.
Then check out this article in my Lion Den Study Tips & Tools . . . Muscle Names.
This article also has more video to help you learn the meaning of muscle names AND a FREE downloadable, printable list of muscle names and meanings (and pronunciations).
For a great resource in learning about muscles, perhaps to add to your growing professional library, check out the book The Muscular System Manual: The Skeletal Muscles of the Human Body
Tuesday, February 9, 2010
Committing Time to A&P
But what to do about time commitments to family, friends, hobbies, and jobs? Depending on your life situation, these could also be very demanding of your time and attention.
In my book Survival Guide For Anatomy And Physiology: Tips, Techniques And Shortcuts
- Share your study time with others. If you have kids, then do your sketching and coloring and concept mapping side-by-side as you kids do their homework. Kids will be more motivated to do their homework when they see mommy or daddy doing homework. And it brings them more into what you are doing, giving them an inside peek at what is taking up so much of your time these days. You can do this with your spouse or friends, too, even if they're not in your A&P class . . . you can work on A&P while they work on their homework (or their sewing or their stamp collection).
- Set aside alone time. Some of your study time probably needs to be free of the distractions of others around you. So set aside time each week to work alone. This may mean getting child care or elder care for part of the week. But such a sacrifice may be worth it if it helps you succeed and reach your goals.
- Get your significant others on board. I recommend that before starting A&P (or early in your A&P adventure) you have a heart to heart chat with your friends, your family, your coworkers, or anyone else who will be impacted by the time and attention you'll need to be giving to your studies. Try to make them a part of helping you achieve your goals. Ask them what they are willing to do to help you. It could be that they promise not to pester you for more time or to refrain from pushing into giving up your study night to go out and party. It could be that they offer to take on some of your chores or other commitments to give you more time for your study. If you just start taking time from friends or family, without it being clear to them why, then you risk them becoming resentful. By making them a part of the process of planning your study strategy, they will feel more a part of your road to success . . . a feeling that will bring you all closer together.
- Make sure you have time just for family and friends. Although you need to set aside significant time for your studies, you also need time for the rest of your life. So as steadfast as you are about protecting your study time, be just as steadfast protecting your friend and family time. When your loved ones know that they're important and will have their time with you, too, they won't feel so bad about losing you to your studies.
- Stay organized. Different folks have different styles of organizing themselves and their tasks. But you have to do something to organize your studies of A&P . . . there's just so much to do and to keep track of and to keep up with. Don't fool yourself into thinking that you can just "wing it." Perhaps you did that in high school or in other college courses. But only the very rare person can do that in A&P successfully. So even if you never done it before, get a calendar and plan out what you need to be doing and when. Regularly assess your progress and adjust your schedule accordingly.
- Know why you're doing this. One of my most successful students reminded me recently after a help session, "Those were great tips, Kevin, but all you really need is a 'can do' attitude." That's absolutely right. If you start with a winning attitude, and stay focused on the reason why you need to know the structure and function of the body so thoroughly, it makes all the time and effort enjoyable. You'll learn more useful information and skills in your A&P course than any other college course. Really. Even stuff that will help you in "real life." So why not make the most of it?
Want to know more? Get new tips from The A&P Student as soon as they are published by subscribing to the FREE newsletter.
And don't forget to submit your own tips to share with other A&P students!
Image source: http://www.flickr.com/photos/bofh/ / CC BY 2.0
Tuesday, December 8, 2009
Scheduling strategies
Here are some strategies that many students have found useful:
- Avoid short classes. OK, you may not have a choice in this . . . but if you do, then avoid classes that meet for 50-minute sessions. More and more schools are scheduling A&P "lecture" classes for longer class periods, meeting twice a week (rather than three times a week). Why?
- Because most students feel that they "just get into it" and the class is over.
- Partly, 50-minute classes are too short because more faculty are incorporating new techniques in "active learning" and other methods to enhance the classroom experience of students. Such techniques, when used effectively, simply do not fit well into a short class period.
- Another reason is that when professors try to build up to the higher-level concepts, they cannot accomplish it within a short time frame . . . and waiting until the next class period will lose the threads needing to be pulled together. You'll understand the lecture/discussion better in longer class periods.
- Avoid "stacking" your classes all on two or three days. A lot of students believe that they are being efficient when they try to stack their entire full-time course load into 2 or 3 days of the week . . . M/W/F only or T/Th only, for example. That may sound like a good idea, but it's usually not. Why?
- First, your brain (and your butt) may not be able to handle hour upon hour of classroom activities effectively. It is not efficient if you cannot take in all that new learning all in one long session. Not only might your learning suffer, but you'll begin to dread coming to school . . . and eventually you'll "turn off" your motivation to be successful in learning.
- Besides giving your brain (and butt) a rest, spreading out your class days allows you to build in breaks in your day that allow other kinds of learning activities. So many of my students struggle to get things done on campus that they need to do . . . because they forgot to build in some "on campus time" for themselves. For example:
- Group study time
- Post-lecture and post-lab student gatherings to review content
- Lab practice (going over models, etc, in the open lab or learning center)
- Tutoring in the learning center
- Library work
- Office visits with professors and advisors
- Campus workshops (for example, student success workshops)
- Eating right
- Campus life (just hanging out and having fun . . . an important part of college)
- Find the right instructor. If you have a choice, you may want to do some research so you can pick the instructor that is the best fit for your learning style. However, this can be very tricky. How do you really know what an instructor is like?
- Never go on word of just one or two students, because they may be at one or the other extreme in their perspective. Get a LOT of input if you can.
- And I suggest that you stay away from those online rating sites . . . they often preferentially attract the extremes, as well.
- The best advice is to interview each instructor. Ask them what approach they take, how they address your individual learning style, what their strengths and weaknesses are. You wouldn't choose a contractor or employee without talking to them first and getting references . . .so why treat your education any differently?
Monday, November 30, 2009
Exam strategies
Even if you do have some tried and true strategies of your own, you may benefit from hearing about what I've seen work well in A&P courses.
First, I have a brief video presentation called . . . wait for it . . . Exam Strategies that runs down the basic strategies.
Then I have some additional tips in previous blog posts:
Exams are coming!
[What do in advance of exam day . . . how to get ready for the "big day."]
Test taking strategies and Exam time!
[What to do on exam day . . . and during the exam.]
Learn from your mistakes!
[A video presentation on how to analyze your previous tests.]
Do you have some of your own tips to share?
Click the comment button and let's hear them!
Monday, November 9, 2009
Build your own body!
Using the online editor at Anatomography you start out with a complete skeleton. You can adjust the opacity (how transparent the bones are) or the color of your skeleton . . . or delete it if you like. Oh, and you can change the background color if you like.
You then add organs from a library of pre-drawn organs. Any organs you like. Make each one a different color or perhaps color-code them by system. If you want to remove organs you've added, that's easy.
At any point, you can rotate or tip your body to the desired perspective. Like the image shown here, where I included the spleen (red) and tilted the body so you can see its position easily.
You can save your image to a file or the program will provide you with a URL where the image is located so that you can share it with your friends . . . or the whole class. (You could even share it with your professor!)
You can also get a URL that links to your image within the editor, so that others can start with your image then add to it or change it in other ways. This could be great for a study group to share the building of a system . . . or a whole body.
Besides being a fun toy to play with, this could really help you understand the anatomy of the human body by building and unbuilding it . . . rotating it around to different angles . . . highlighting different areas with different colors . . . making organs translucent so you can see through them to nearby organs . . . and more.
It's also a great tool to produce images for your flash cards, your concept maps, your class notes, PowerPoint slides, and other study tools.
Because your textbook and lab manual cannot possibly illustrate every organ at every possible angle, the images you produce with Anatomography can help you visualize organs that you otherwise would have a hard time visualizing.
The program isn't perfect. For example, the only skeletal muscle in the available library is the diaphragm. But for other systems, the library is fairly complete.
What uses can you think of for Anatomography?
Wednesday, October 21, 2009
Learn from your mistakes!
The reason you should do it is so that you can learn from your mistakes. Not only will you need those concepts you missed when you take the final exam, you'll need them to understand the rest of the course.
Besides, you're going to have to identify and fix any problems with your test-taking skills.
If you just casually scan your test, then you may not get much out of it. You need to take a more organized, focused approach.
Here's a brief video running down how this works.
Want a FREE sample Test Analysis Chart? More information on how to analyze your test? Then go to lionden.com/testreview.htm
A skull a day?
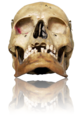
Well with a certain holiday coming up soon, it's probably a good time to share one of my favorite blogs with you . . . a crazy, wonderful blog called SKULL-A-DAY that you should visit.
The project started out when this guy named Noah Scalin made a paper skull and posted it, then kept on making skulls in various media and in different forms every day for a year.
Then folks just kept adding to it and, well, now it's a pretty big project. The one shown here is one of my favorites . . . a skull carved from a watermelon! There's even a book version now! The book is called SKULLS
As many of you A&P students are skull fans by now, or ought to be, I thought you might like to see all those skulls.
For Facebook users, there's an application called Send-A-Skull that allows you to send skulls to your friends.
Wednesday, October 14, 2009
Help with learning the skeleton
They also have found it useful to learn the naming system for bone markings first, before trying to even find the specific markings on the skeleton. This method for understanding the conceptual framework before you begin learning a list of structures is more fully explained in my Survival Guide For Anatomy And Physiology: Tips, Techniques And Shortcuts
In the Survival Guide, I explain how learning bone markings is like learning geography. Before you can find specific calderas on a map, you have to know what a caldera is. Should you be looking for a stream? A mountain? A valley? Once you know a caldera is a volcanic mountain that has collapsed for form a big crater, it's easy to find any caldera assigned to you on a map. You won't waste your time and effort looking at every feature . . . just the big craters. And knowing what a caldera is, you'll remember what it looks like as you learn the name.
Thus, if you learn that a condyle is a rounded bump where a bone articulates (joins) with another bone, it's easy to find and remember all the condyles in the skeleton. If you know that a foramen is hole, then finding them (and remembering them) is now that much easier.
When we compare learning anatomy to learning geography, we are using an analogy. Such analogies are comparisons that help us learn.
Something my students have found to be really, really helpful in finding good analogies for learning the bone markings is the Visual Analogy Guide
Created by my friend Paul Krieger at Grand Rapids Community College (GRCC), the Visual Analogy Guides
Using his considerable skills as an illustrator and his great talent as a teacher, Paul has put together some great tools that help students focus their study time by using visual and kinesthetic processes to help them learn "the hard parts" of A&P.
Check out his video, in which he explains how the Visual Analogy Guides
100 Best Web Tools for Science Students
I recently became aware of a new website that includes a handy list of the 100 Best Web Tools for Science Students. It includes virtual laboratories and experiments, explorations and web quests, basic foundations and principles, research and collaboration sites, modeling and mapping tools, plus links to search engines and databases.
Although the list includes resources covering a variety of science topics, several could be very useful to A&P students. Just a few examples:
1. Virtual Labs at the Howard Hughes Medical Institute A free tool that enables students to take on the role of scientist, technician, doctor, and immunologist. They participate in labs on topics related to cardiology, immunology, and bacterial identification.But be careful! There are a lot fun links, like virtual field trips to the plains of Africa, that might distract you from studying A&P. Well, OK, it's a good thing to have a little fun, too.
57. Note Mesh A web 2.0 app that allows college students in the same science classes to share notes online using a wiki set-up.
73. Flashcard Exchange Print flashcards, create flashcards and study science topics online with this tool, the world’s largest flashcard library.
86. Virtual Cell A simulation of the look and feel of moving through an actual cell or cellular component. Students are encouraged to play the role of a biologist and examine cellular organelles, conduct experiments and form conclusions.
Wednesday, October 7, 2009
Bone song and dance

You can't dance without your skeleton, right? But can you sing and dance about the skeleton? Well, the TV character Hannah Montana thought so when she needed to learn the bones for her A&P class.
As I've mentioned before silly songs are a great learning tool!
(see Pinky & the Brain and Pump your blood)
You'll want to see the video showing the song and dance.
Then you'll want to see the video that helps you learn the lyrics.
Tuesday, September 29, 2009
Study Cards
You may be interested in a new study tool that has just become available to anatomy and physiology students . . . Mosby's Anatomy & Physiology Study and Review Cards
This boxed set of full-color study cards was assembled by my good friend Dan Matusiak, who is an excellent teacher of A&P. Using some the of amazing new art recently commissioned by Mosby (Elsevier Publishing), Dan has created a whole toolbox of helpful study cards to help you learn your A&P . . . then help you to quickly review it later.
There are 329 cards divided into 20 sections with handy color-coded sections to help you locate topics easily. Their 4 inch by 5.5 inch size means that they'll also stack easily with any 4 x 6 index cards that you may already be using to study A&P.
Additional features include:
- This set introduces the user to the Leitner method, a time-tested strategy to improve retention and streamline study time through flash cards.
- More than 200 of the cards feature a detailed A&P illustrations on the front, while the back identifies the anatomic structures or physiologic processes with numbered labels.
- The set features hundreds of study questions with answers to reinforce core content.
- Compact and convenient size makes it easy to study the cards wherever you choose.
Monday, September 7, 2009
Learning anatomic structures
When you first face human anatomy in the lab course, it can seem overwhelming. All those parts. And parts of parts! Yikes!
Many inexperienced students feel that their objectives consist entirely of memorization. Often, they feel that memorizing the particular models, specimens, and diagrams available to them in the lab course are the beginning and end of the process facing them.
That's wrong on several counts.
First, what good is taking this course, if you are simply going to memorize things that will be useless to you outside of this particular course . . . when you'll face other specimens, perhaps even real human bodies?
Second, there is a far easier way to learn your anatomy—even a long list of required structures—than merely memorizing them. If you first construct a conceptual framework, before learning all those parts, your learning will be faster, easier, and more accurate. AND you'll be more likely to hold on to that information (and recall it when you need it) so you can use it in the future!
A conceptual framework is just a "picture in your head" of how it all fits together—a rough pattern to begin with. When you fit new knowledge into a pre-existing pattern, after you know what to look for and remember, the new learning has meaning for you.
Usually, the lab manual, handouts, pre-lab activities, and other explanations your lab instructor provides give you the framework upon which you can hang all that new stuff you are learning. It's just that most beginning students just don't recognize these helps for what they are.
For example in my textbooks and lab manuals, I provide lists of what the different bone markings are.
A foramen is a simply a hole, for example. But I can't tell you how many students jump into their lists of bone markings without even knowing that every part with "foramen" in the name is hole!
They're poring over diagrams and trying to figure out whether it's the hole or the nearby bump . . . or maybe it's that little depression. Yikes! No wonder it takes them so long to learn . . . and what they learn is so easy to forget.
Starting with a framework, what the names of bone markings mean, makes learning all the markings fun and easy!
For a link to a sample of a framework you can use, go to the related article in the Lion Den.